How to Install SnipeIT with Docker
What is Snipe-IT?
Snipe-IT is an open-source IT asset management system basically, software that helps you track and manage your company’s physical and digital assets (like laptops, phones, software licenses, and accessories).
Key Features
- Asset Tracking: Manage computers, monitors, phones, licenses …
- User Management: Assign assets to employees or departments.
- Check-in / Check-out: Log who currently has each asset.
- Software Licenses: Track license keys and expiration dates.
- Accessories & Consumables: Manage items like chargers or cables.
- Reports & Audits: Generate reports on asset usage, depreciation, or history.
- Barcode Support: Print and scan barcodes for quick asset lookup.
- Email Notifications: Send alerts for check-ins, warranties, or license expirations.
Technical Side:
- Built with Laravel and MySQL/MariaDB.
- Has a modern web interface .
- Can run on Linux, Windows, Docker, or cloud servers.
- Offers REST API for integration with other systems (like HR, ticketing, etc.).
Minimum Requirements
Before installing Snipe-IT, make sure your system meets the following requirements:
1. Operating System
- Linux (Ubuntu, Debian, CentOS, AlmaLinux, etc.)
- Windows (using Docker Desktop or WSL for testing)
2. Hardware Requirements
| Environment | CPU | RAM | Storage |
|---|
| Small (10–50 assets) | 1–2 cores | 2 GB | 10 GB |
| Medium (50–500 assets) | 2–4 cores | 4–8 GB | 20–40 GB |
| Large (500+ assets) | 4+ cores | 8+ GB | 50+ GB |
Step 1: Installation
- update and upgrade system repositories using the following command:
1
| apt update -y && apt upgrade -y
|
- Clone the project from Github:
1
| sudo git clone https://github.com/snipe/snipe-it.git
|
- Alter the Docker compose file
1
| sudo nano docker-compose.yml
|
- Change the default port to 8888:80
- Alter the file .env.docker
1
2
| sudo cp .env.docker .env
sudo nano .env
|
- Change the app port to 8888
- Change the MYSQL password
1
2
| MYSQL_PASSWORD=changeme1234
MYSQL_ROOT_PASSWORD=changeme1234
|
- Change the app URL in case you have a domain or subdomain, in my case i will use the test ip of my machine
1
| APP_URL=http://192.168.1.146:8888
|
- Install the Application
1
2
3
| docker-compose up -d
or
docker compose up -d
|
- Access the app from your browser using the ip and port
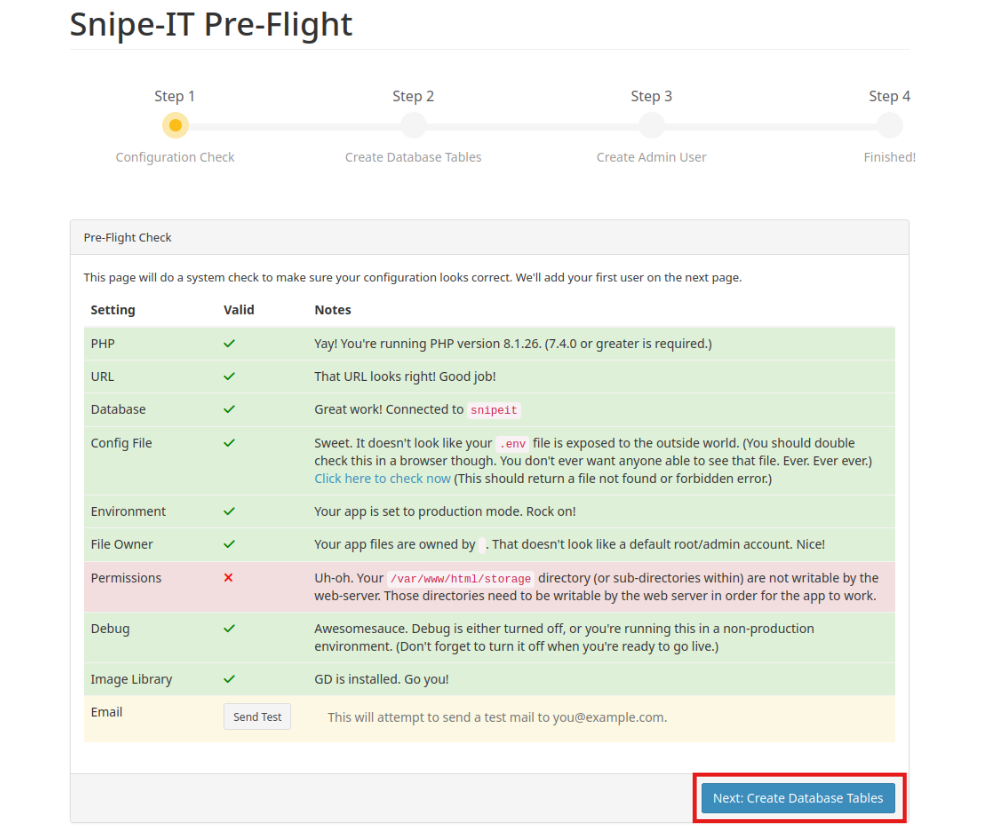
Step 2: GUI Configuration
- just ignore this permission error by clicking Next
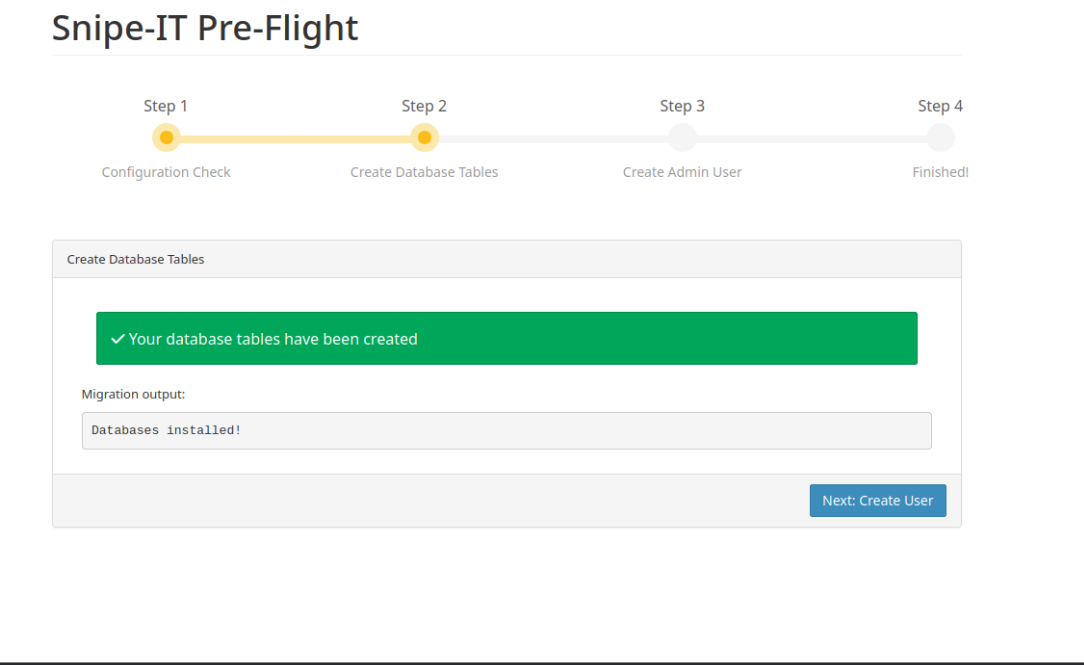
- Validate table creation in DB
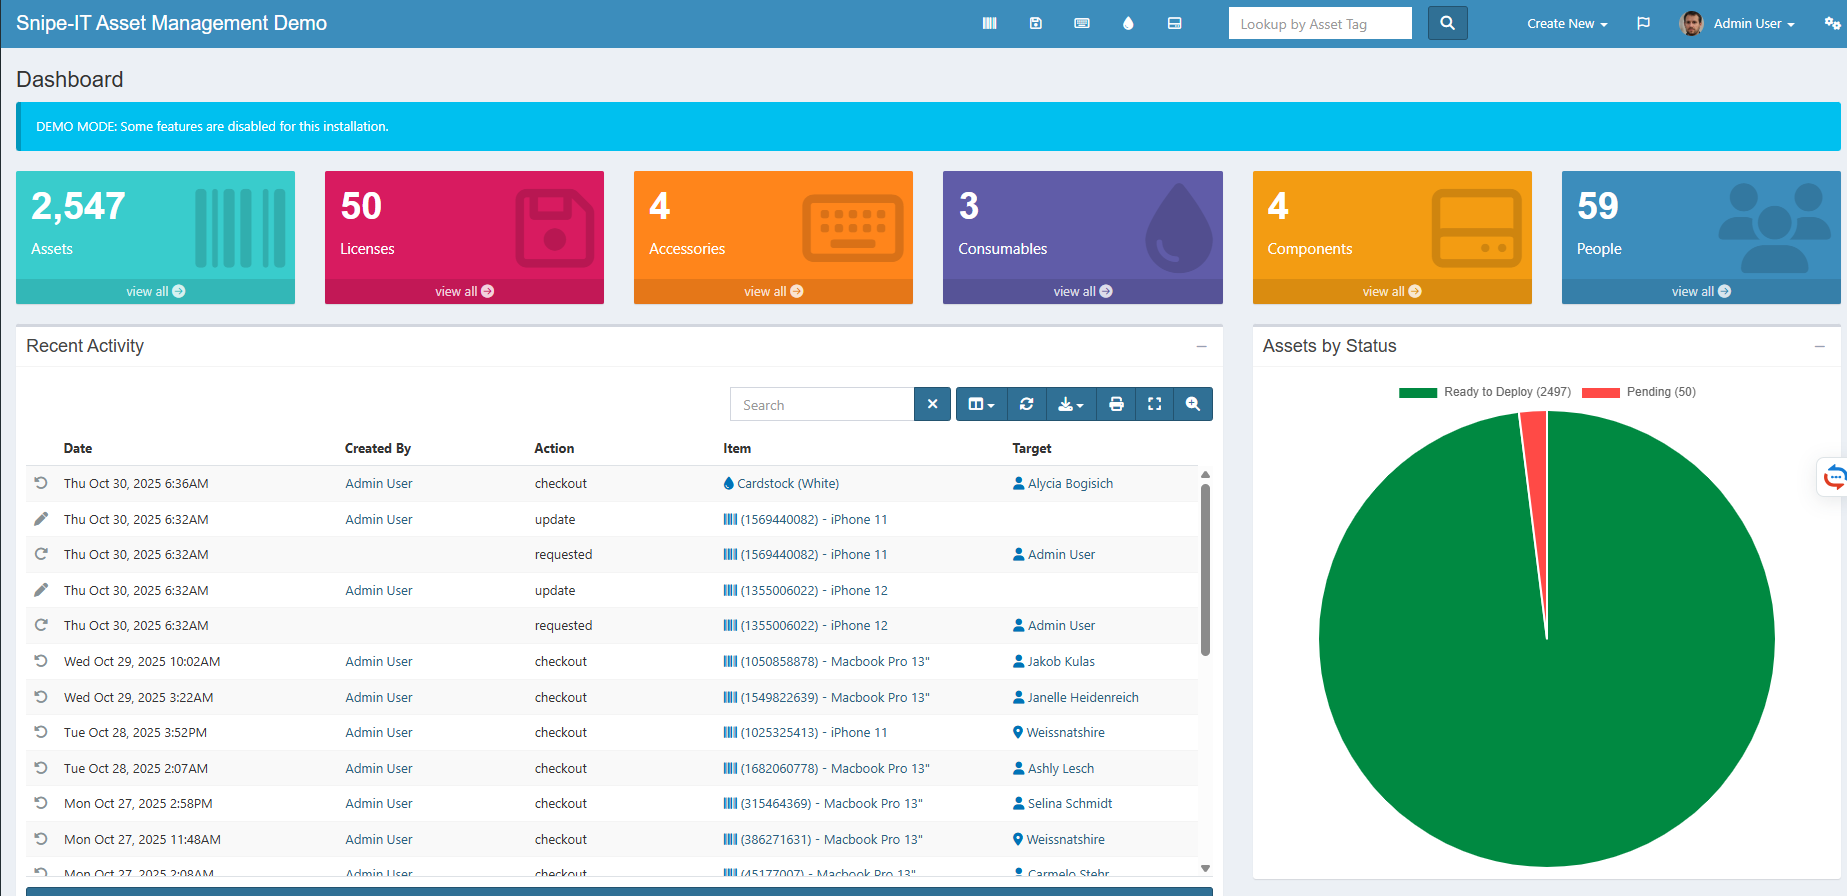
Then you will see the SnipeIT dashboard
This tutorial is finished have a great day! 😃